This page is currently in the process of being expanded on. Please note that there may be missing or incomplete information.
Collaborative Guide
Collaborative guides are edited by the general community based on a general focus and are works of opinion. Please use the Discussion page or the Discord if major changes are required.
“
Let's play together!
„
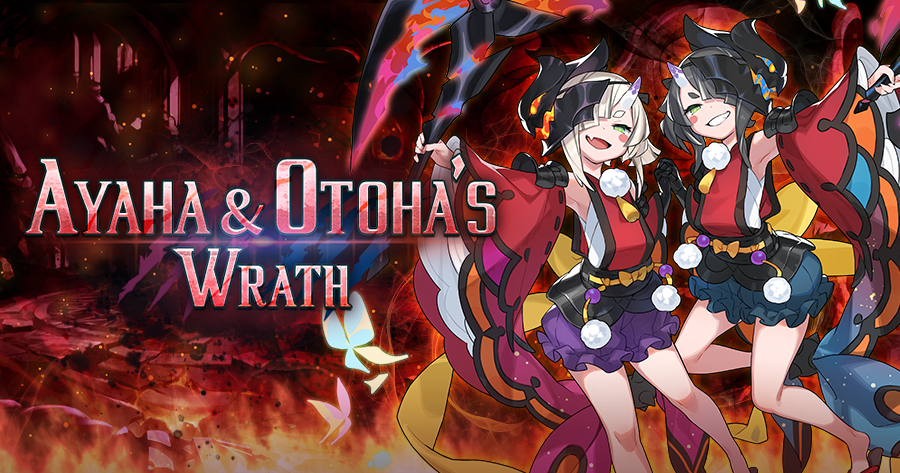
Ayaha & Otoha's Wrath: Expert is a challenge quest centered on a boss battle with Ayaha & Otoha, unlocked upon the completion of Chapter 10 and any Advanced Dragon Trial at standard difficulty, and meeting the minimum might requirement of 28,000.
Additionally, clearing Expert difficulty for the first time rewards the player with sufficient amount of materials to obtain a copy or unbind of a 6 water Agito weapon.
Weekly bonuses from clearing the Expert difficulty also provide a small amount of Rebellious One's Cruelty, which can be used for enhancing a water Agito weapon past 4 unbinds, as well as allowing for refinement, granting additional strength, new abilities, and might.
HP isn't too much of a concern, as most adventurers should be able to withstand the unavoidable damage Ayaha & Otoha inflicts throughout the fight if they came prepared with sufficiently strong equipment.
Weapons[ | ]
For Expert, at a minimum, adventurers should be equipped with at least a 5 Chimeratech weapon; these weapons are in fact required before you're able to craft Agito weapons in the first place.
Support adventurers such as standard healers (non-Overdamage), Elisanne and Gala Elisanne can get by with a Chimeratech without issue.
For DPS adventurers, while it is possible to clear with a Chimeratech, it is highly suggested to use a stronger weapon, such as an Agito weapon instead, or less preferably, a highly-upgraded High Dragon weapon (at least 6 unbinds).
It's easier to start with the 0UB Agito weapon, and unbind it instead. If you already crafted one from Standard first clear rewards, use it!
High Dragon weapons can become very expensive to unbind for its later unbinds, and its power is inferior to Chimeratech weapons before 6 unbinds. If you already have it, though, use it.
Karina as well as any possible substitutes should use a 4UB+ Agito weapon for speedclearing.
Weapon Category
Sword
Blade
Dagger
Axe
Lance
Bow
Wand
Staff
Manacaster
Chimeratech (OK performance, not recommended for DPS)
Everyone should ideally be equipped with a max-unbound 5 Water-attuned dragon for Expert.
Standard healers such as Jiang Ziya and support adventurers such as Elisanne and Gala Elisanne may carry weaker dragons, as their personal DPS is usually not too relevant.
Overdamage healers such as Dragonyule Lily should still try to utilize a strong on-element dragon wherever possible.
Note that due to general viability of adventurers in this quest, only a select few adventurers are shown in this section.
Standard DPS - Most DPS adventurers use these standard DPS dragons.
Niche exceptions aside, Gala Reborn Poseidon dwarfs all other dragons here due to his extremely high strength boost and water elemental damage boost as well as his powerful dragonform.
Gaibhne & Creidhne significantly improves skill cooldowns, increasing adventurer damage, and their SP Regen buff zone also significantly helps other teammates.
Leviathan has an extremely powerful dragon form, useful for increasing damage during break state, and can inflict guaranteed Bog while Ayaha & Otoha are vulnerable.
Siren increases skill damage, though her dragon form is lackluster.
Nimis can become devastatingly strong if there are reliable sources of Critical Rate Up abilities, co-abilities, chain co-abilities, buffs, or Inspiration.
Dragonyule Jeanne significantly increases the critical rate of adventurers and can make running Critical Damage Modifier Up abilities worthwhile.
Low Skill Damage DPS + Dragonyule Lily - These DPS adventurers have lower emphasis on skill damage (none for Pipple), and Dragonyule Lily's overdamage relies on having a high Strength, so Siren won't work on them very well.
High Mercury and Poseidon can be used in place of the usual DPS dragons on Dragonyule Lily for higher success rates in auto compositions.
I usually don't dish out skill damage, but... - These adventurers are somewhat odd - Eugene usually buffs, and Catherine usually relies on standard attack damage. However, they also have infrequent access to extremely strong nukes with their second skills, which can make Styx somewhat usable, as long as no damaging shared skills are in use. Still, it usually is better to use a standard DPS dragon that requires less finagling.
Buffer Elisannes - Elisannes don't have much skill damage, and spends most of the time buffing the entire team. Both versions of Elisanne will prefer having their skills ready earlier with either Gaibhne & Creidhne's (Water) Skill Recharge IIIf the user is attuned to Water: fills 35% of a skill's skill gauge after using that skill. or Halloween Maritimus' Skill Haste Up, but most non-Skill Damage dragons work well.
Archetypical Quad Karina Cheese - This build capitalizes on Karina's inbuilt Skill Prep +100% & Skill ChargeFills 100% of skill gauges at the start of quests. Using a skill fills skill gauges by 5%. to cast one or more Patia-like Shared Skills immediately, triggering doublebuffs to power up Raging Tide from the get-go.
As this build has a flex slot, depending on where the Strength Doublebuff wyrmprints are allocated, feel free to use whatever that is most consistently useful to your team.
The build has two main routes: You have Felyne Hospitality or you don't. Both work just fine.
In the case of using Felyne Hospitality, all three 5 slots are filled, and thus Strength Doublebuff must be put into a 4 slot. This is where Sisters of the Anvil or First-Rate Hospitality come in.
The second 4 slot can be filled with the affliction punisher, but it can also be filled with Halidom Grooms for Energy Doublebuff (as to provide another source of increased damage)
In the case where Felyne Hospitality isn't used, it is more efficient to run Brothers in Arms in its place while freeing up a 4 slot.
This leaves a 4 slot as a pure flex slot due to not needing a 10% Strength Doublebuff print. Halidom Grooms is probably the best option due to the general lack of 4 prints that still help with the build significantly, due to the other prints and Karina putting out so much damage.
Party Roles[ | ]
Note that due to general viability of adventurers in this quest, only a select few adventurers are shown in this section.
DPS/Support[ | ]
These units will be doing the majority of the DPS, and sometimes provide support and/or additional utility.
Don't run more than 1 of either Elisanne in the entire team.
Defensive support healer with Burn relief. Can bail out burning teammates, provides Defense Up buffs, maintains a healthy amount of regen healing, and allows more equipment flexibility due to Skill Prep +100%Fills 100% of skill gauges at the start of quests..
Dragonyule Lily provides access to overdamage, which can elevate teamwide DPS and especially the hit count (for activating combo-based abilities). She also provides very strong spot-healing to individual damaged adventurers with her force-strike gift healing, and can also reach very high levels of Strength by the former action. Being dual-resistant, Dragonyule Lily will never be disabled or put into danger by any possible affliction.
An odd healer that cleanses burns, but is himself stun-resistant. This property does let him perform burn cleanse where a Jiang Ziya might not be able to. He'll require a mana spiral upgrade to actually perform as advertised, but is a viable healing option otherwise.
General Party Setup[ | ]
Most compositions will work fine for this quest, so long as at least one adventurer can provide healing in any form, and a source of damage-over-time and disabling afflictions is available.
For healing in 4DPS compositions, this is usually accomplished with Healing Doublebuff wyrmprints and defensive buffs, or healing shared skills.
Frostbite is the prefered damage-over-time affliction, and many Water-attuned adventurers can inflict it.
Freeze and Stun can be inflicted by some Water-attuned adventurers.
Lily (both played and shared skill) and Dragonyule Cleo (if played) provide access to guaranteed Freeze.
Warabe Asobi is a special effect that will alter Ayaha & Otoha's resistance to afflictions. The affliction resistance changes depending on the "game" (moves) they are using, but generally speaking, they will be vulnerable to afflictions while the condition is active, even if they have been previously afflicted.
Note that you may only Freeze or Stun once every Warabe Asobi activation.
You cannot freeze or stun Ayaha & Otoha twice in a row.
However, you can freeze Ayaha & Otoha, then follow it with a stun immediately afterward, and vice versa.
In either phase, Warabe Asobi's ability icon (below Ayaha & Otoha's HP bar) will brighten when it is active.
In phase 1, you will be able to tell when it activates by the "Let's Play" callout.
In phase 2, the following attacks will activate Warabe Asobi:
Kagome Kagome
Onigokko
Hana Ichi Monme
Abukutatta Nietatta
On Tosenbo and Toryanse[ | ]
With Tosenbo and Toryanse active, Ayaha & Otoha will gain significant amounts of damage reduction and a rapid gain of Strength, making DPS poor and survival difficult. Use afflictions to disable their effects.
Toryanse increases Ayaha & Otoha's strength by 10% every tick. These very frequent buffs last for 60 seconds, making Dispels ineffective in stemming the flow of buffs.
Toryanse ticks every 6.5 seconds on human Ayaha & Otoha.
Toryanse ticks every 4 seconds on therion Ayaha & Otoha.
When a disabling affliction is inflicted, all Toryanse-induced Strength buffs will be instantly removed.
Phase 1[ | ]
The following lists moves that tend to be seen in the average run as of Update 2.3.0, which is usually 2-3 minutes. Slower runs may see additional moves that have yet to be described.
Cross Charge[ | ]
Ayaha & Otoha charge towards the furthest adventurer. The attack is unavoidable within the marker.
One of the adventurers should move further away right after START disappears so that Ayaha & Otoha are pushed up against a wall.
This adventurer should still stay far away to prepare for the following attack.
Zukkorobashi[ | ]
Ayaha & Otoha attempt to trap the furthest adventurer with a red-marked prison, and then send unavoidable damage within the purple path. Move away from the affected location.
Let's Play[ | ]
Kirikiri Mai[ | ]
This is a good opportunity to Stun or Freeze Ayaha & Otoha and cancel the attack.
Cross Charge x4[ | ]
Ayaha & Otoha charge towards four adventurers successively. Avoid lingering within marker positions and using skills might be unsafe, as you might get Stunned.
Let's Play[ | ]
Ura Omote[ | ]
Ayaha & Otoha emit two beams and rotates clockwise. The blue beam inflicts Stun, and the orange beam inflicts Burn. This attack is not avoidable within their marker, so avoid getting hit, or use a dragon skill to tank it - keeping in mind that you'll still need to continue moving to be safe.
This is a good opportunity to Stun or Freeze Ayaha & Otoha and cancel the attack.
The phase change transition animation takes a fairly long time, so this might be a good time for Gaibhne & Creidhne, Leviathan, and/or High Mercury users to shapeshift and prepare to use their skills, and anyone in low HP and not receiving healing should also do so for additional safety.
Gaibhne & Creidhne users may immediately use their skills to provide a SP Recharge buff zone.
Leviathan and High Mercury users should wait until shortly before Overdrive starts before using their skills, so that the skill hits and inflicts bog.
This entire mechanic can be cancelled, but only with a well-timed cast of Lily's Level 4 Glacial Blossom. As Glacial Blossom's animation sets a marker on the target that doesn't follow them before actually dealing damage on a delay, the skill needs to be cast while the twins are about halfway to the middle of the room so that the marker marks somewhere close enough to hit the twins but isn't directly on top of them (if the marker is directly centered on them, chances are you are too late because the long animation won't apply the freeze before it's too late). Too soon and the marker will completely miss. Too late and Ura Omote goes through and hits you due to the large amount of end-lag. Usually, you will have to know when this mechanic takes place so the freeze can hit.
If Freeze successfully lands and Ura Omote is interrupted, the twins would be right next to each other and helpless for at least 3 seconds, leaving them extremely vulnerable to attack, as most attacks would hit both twins at once and thus deal twice the damage.
Phase 2[ | ]
Unavoidable Purple[ | ]
Unavoidable damage. If anyone is at low health, use a defensive buff or healing skill before it hits!
Ayaha & Otoha will use this move again when HP thresholds are met.
Gaibhne & Creidhne users can shapeshift during the phase change, place down their SP Regen zone then deliberately use this attack to get hit out of dragonform so they themselves can use the SP Regen zone to fire off skills.
Anta ga Tadoko sa[ | ]
One wide purple attack marker and one thin red purple attack marker appear. The thin red marker attack strikes earlier, and anyone caught in it will be locked in place, right into the path of the damaging attack. Make sure to dodge or iframe the red marker, then get out of the purple zone.
Charge[ | ]
Ayaha & Otoha charge towards an adventurer. This attack can be iframed.
Wing Swipes[ | ]
Ayaha & Otoha performs two, sometimes three wing swipes towards surrounding adventurers. Dodge or iframe.
If DPS is low, they will perform a third swipe, indicated by a "!!" and the lack of an attack marker.
If Ayaha & Otoha performs this third strike, keep in mind that most attacks will be wasted as she will be too high for attacks to connect.
Unavoidable Purple[ | ]
Onigokko[ | ]
A blue butterfly chases the furthest adventurer.
This butterfly inflicts severe damage and Stun on contact. The targeted adventurer should move across Ayaha & Otoha's position, so that the butterfly strikes Ayaha & Otoha and stuns them instead.
You can increase the time Ayaha & Otoha is spent in a disabled state by chaining this stun with a freeze as it expires. Timing guides for the following high-reliability freeze moves are provided.
To use Starlit GiftLv. 1: Deals 11 hits of 168% water damage to enemies directly ahead, inflicts freeze for 3-6 seconds with 100% chance, and increases the energy levels of the user and nearby allies by one stage. This skill activates "Skill Shift" if the attack connects.
Phase II increases the strength of the user and nearby allies by 10% for 10 seconds, while Phase III increases their critical rate by 8% for 10 seconds. [3136 SP]
Lv. 2: Deals 11 hits of 176.4% water damage to enemies directly ahead, inflicts freeze for 3-6 seconds with 110% chance, and increases the energy levels of the user and nearby allies by one stage. This skill activates "Skill Shift" if the attack connects.
Phase II increases the strength of the user and nearby allies by 10% for 10 seconds, while Phase III increases their critical rate by 8% for 10 seconds. [3136 SP]
Lv. 3: Deals 11 hits of 187.6% water damage to enemies directly ahead, inflicts freeze for 3-6 seconds with 120% chance, and increases the energy levels of the user and nearby allies by one stage. This skill activates "Skill Shift" if the attack connects.
Phase II increases the strength of the user and nearby allies by 10% for 10 seconds, while Phase III increases their critical rate by 8% for 10 seconds. [3136 SP]
Lv. 4: Deals 11 hits of 190% water damage to enemies directly ahead, increases the energy levels of the user and nearby allies by one stage, and activates "Frigid Gift". When this effect is active, the user's next force strike will inflict freeze for 3-6 seconds with 200% chance.
This skill activates "Skill Shift" if the attack connects. Phase II increases the strength of the user and nearby allies by 10% for 10 seconds, while Phase III increases their critical rate by 8% for 10 seconds.
If this skill is used as a Shared Skill or Helper Skill, this skill inflicts freeze for 3-6 seconds with 140% chance, but does not activate the Frigid Gift effect. [3136 SP], force strike when stun expires, or use the skill if it's a shared skill.
To use Glacial BlossomLv. 1: Deals 2 hits of 614.6% water damage to the target and nearby enemies, and inflicts freeze for 3-6 seconds with 100% base chance. Frostbitten foes take 2 hits of 798.98% water damage instead. [2490 SP]
Lv. 2: Deals 2 hits of 645.4% water damage to the target and nearby enemies, and inflicts freeze for 3-6 seconds with 110% base chance. Frostbitten foes take 2 hits of 839.02% water damage instead. [2490 SP]
Lv. 3: Deals 2 hits of 677.6% water damage to the target and nearby enemies, and inflicts freeze for 3-6 seconds with 120% base chance. Frostbitten foes take 2 hits of 880.88% water damage instead. [2490 SP]
Lv. 4: Deals 2 hits of 740.6% water damage to the target and nearby enemies, inflicts freeze for 3-6 seconds with 200% chance, and frostbite - dealing 41% water damage every 2.9 seconds for 21 seconds - with 120% chance. Frostbitten foes take 2 hits of 962.78% water damage instead. [2490 SP], use the skill about 1 to 2 seconds before stun expires - the circle should be about 1/3 full before you use the skill.
Unavoidable Purple[ | ]
Hana Ichi Monme[ | ]
Two purple crossed markers target a random adventurer. The adventurer should move to the top-right corner of the arena, which will maximize the size of the safe area.
Once a large purple circular attack marker spawns, the targeted adventurer should start moving towards the bottom-left corner. The crossed markers will shoot out blue and orange beams that cause rapid damage and inflict afflictions.
Soon afterwards, red butterflies will spawn, twice on each adventurer, and all adventurers should avoid lingering on their spawn points which are purple and inflict severe damage and Burn.
In co-op mode, the final blast from the giant attack marker is likely lethal.
You can use a dragon skill to iframe the blast.
The center of the circular attack marker also moves all adventurers towards it, making it harder to escape from it, especially if you're inside it.
It's usually more precise to move normally instead of dodge-rolling.
Dragon form prevents the movement effects of the attack from taking place.
Unavoidable Purple[ | ]
Abukutatta Nietatta[ | ]
Ayaha & Otoha flies up and becomes invulnerable, and two butterflies spawn. These butterflies slowly move towards Ayaha & Otoha, and must be destroyed ASAP.
The white butterfly inflicts Burn, and the black butterfly inflicts Stun.
When destroyed, they spawn a dome that inflicts their associated afflictions. Off-resist adventurers should not be too close to them when they're about to be destroyed.
What happens afterward depends on how many butteflies manage to reach Ayaha & Otoha.
If both butterflies reach Ayaha & Otoha, lethal damage is inflicted to all adventurers, using up a revive.
If only one butterfly reaches Ayaha & Otoha, severe damage is inflicted, and its associated affliction is inflicted.
If both butterflies are destroyed, Ayaha & Otoha will fall straight down to the ground and be temporarily disabled.
If Ayaha & Otoha makes contact with the domes that the butterflies leave behind, they will also be inflicted with these afflictions.
Charge[ | ]
If Ayaha & Otoha weren't stunned by landing on a black butterfly dome, it is possible for the furthest adventurer to intentionally bait them towards a black butterfly dome to inflict Stun.
This should be done by a stun-resistant adventurer, or by a shapeshifted (including Tiki, but notYurius) unit.
Unavoidable Purple[ | ]
Kagome Kagome x2[ | ]
Two red butterflies spawn on two adventurers. After a certain period of time, these butterflies will spawn purple attacks where the adventurers are, and inflict severe damage and Burn.
It is possible to inflict burn on Ayaha & Otoha by placing these butterflies on top of Ayaha & Otoha for extra damage.
Burning will also decrease their damage resistance if there are no existing damage-over-time afflictions.
Hana Ichi Monme[ | ]
Charge x4[ | ]
Ayaha & Otoha will charge towards four adventurers in a row.
Attacks and Patterns (Quad Karina)[ | ]
The Quad Karina cheese is dependent on a build outlined in the Wyrmprints Section of this guide. Every Karina must also be equipped with at least one of the following Shared Skills: Sparrow's Guard, Knight's Spirit, Sweet Protection, Mercenary Guard, Rowdy Rumbler (the provided shield may interfere with taking enough damage to get out of dragon form) as well as a second Shared Skill from the previous list or one of the following: Tropical Breeze, Majestic Tide, Ocean Fury, Sunny Flash.
Phase 1[ | ]
Cross Charge[ | ]
Group bait to the bottom left of the arena, as to keep both twins together. Once there, cast any party-wide defense buffs before rolling out of the strike zone.
Zukkorobashi[ | ]
Whoever got targeted should dodge-roll to safety. All four players should cast Black Flag followed by Raging Tide. Phase 1 should be over.
Phase 2[ | ]
Before phase 2 even begins, at least 1 but no more than 2 Karinas equipped with Gabhine and Creidne should shapeshift.
Unavoidable Purple[ | ]
Shapeshifted Gabhine and Creidnes should use their skill as the damage should knock them out of dragon form (this is why you do not want Rowdy Rumbler's shield).
Get inside of the buff zones, and just spam your skills. Order doesn't really matter because you get so much SP from the zones.
Those who brought along Ocean Fury or Sunny Flash should try and Bog the boss now, as it significantly increases DPS in a time where the entire party is DPS-ing the boss.
Anta ga Tadoko sa[ | ]
Avoid the cage marker at all costs, even if it means getting out of the buff zone. While you certainly will survive thanks to the doublebuffs, you are not DPS-ing if you are stuck! Once safe from the attack, continue to spam skills as usual.
Charge[ | ]
Dodge/Iframe the marker, follow the boss and continue attacking it, using skills as soon as they come up. If there are any Gabhine and Creidnes who have yet to shapeshift, they should do so to provide an SP fill zone.
Wing Swipes[ | ]
Happens only in very slow runs. Shapeshifted Gabhine and Creidnes should use it to get out of dragon form. Otherwise, spam skills as usual and Iframe the swipes with a roll if needed.
Unavoidable Purple[ | ]
Continue to attack the boss as usual, but do not use a skill right before it hits or it will get canceled. Once it hits, continue to DPS as usual.
Hana Ichi Monme[ | ]
Deal with the attack as usual if it pops up. It is very possible you have Broken the boss at this point, at which the run will be over as you should have more than enough DPS to kill in a Break phase.
Aside from dealing with the attack in the usual way, if the adventurer targeted by the cross beams has Gabhine and Creidne equipped AND has a shapeshift immediately availiable, they should delibrately get targeted and stand in the big circle (but NOT the cross beams) until the circle is almost full and dragonform about to expire, at which point they use their dragon skill to Iframe the rest. Pulled off correctly and there will be a buff zone where the nearly broken boss is leading to subsequent break and close-out of the fight.
 Soaring Ones' Mask Fragment and
  Liberated One's Mask Fragment, which can be used to craft 6
  water Agito weapons, and can be used to upgrade the
  Water Tree facility.
 Chimeratech Anomalocaris
 Chimeratech Hadranax
 Chimeratech Vetulicola
 Chimeratech Helmetia
 Chimeratech Takakkawia
 Chimeratech Hallucigenia
 Chimeratech Hurdia
 Chimeratech Metaldetes
 Chimeratech Marella
 Absolute Aqua
 Ruinous Torrent
 Tideruler's Maw
 Mercy's Azure Tide
 Limpid Rush
 Azure Mercurius
 Aquatic Spiral
 Ocean's Embrace
 Aqua Trigger
 Ame no Murakumo
 Ame no Habakiri
 Futsu no Mitama
 Ohohagari
 Ame no Nuhoko
 Ame no Hajiyumi
 Omizununo
 Kunado
 Ame no Torifune
 Xander
 Summer Celliera
 Celliera
 Valerio
 Mitsuba
 Tiki
Tiki
 Karina
 Summer Julietta
 Xainfried
 Fjorm
Fjorm
 Lily
Lily
 Yurius
 Lapis
Lapis
 Gala Reborn Poseidon
 Gaibhne & Creidhne
 Leviathan
 Siren
Siren
 Dragonyule Jeanne
 Nimis
Nimis
 Hunter Sarisse
 Pipple
 Yoshitsune
 Dragonyule Lily
 Eugene
 Catherine
 Styx
Styx
 Elisanne
 Gala Elisanne
 Halloween Maritimus
 Simurgh
 High Mercury
 Poseidon
 Jiang Ziya
 Ricardt


 Dragonyule Cleo
 Laranoa