| “ | Team up to take on a powerful boss with up to 16 adventurers at once! | „ |
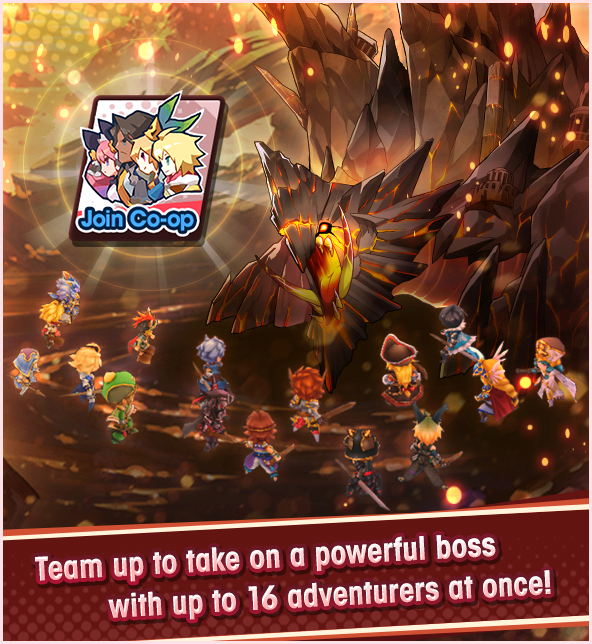
Raid Events are an event type in which players can cooperate with 3 other players' teams to take down a giant boss. Primary rewards from this event type include an exclusive 4 ![]() Adventurer, 5
Adventurer, 5 ![]() Dragon, and 4
Dragon, and 4 ![]() Wyrmprint.
Wyrmprint.
Quest Types[ | ]
Story Quests[ | ]
Each Raid event includes a prologue story viewable upon first entering the Raid event menu, as well as 5-8 story episodes and a sprinkling of short quests to complete. These story episodes and quests must be completed to fully unlock most of the Raid event proper. Additionally, after the event has concluded, an epilogue story will be available to view.
Boss battles[ | ]

Boss battles[1] are a quest that can be attempted solo or in co-op, and act like traditional co-op quests where only 4 units total are allowed (1 per player). This tends to involve fighting a regularly-sized boss, as one might see in other quests. This quest is the primary source of ![]() Otherworld Fragments to challenge the Raid battle, as well as
Otherworld Fragments to challenge the Raid battle, as well as ![]() Bronze Emblems.
Bronze Emblems.
Raid Battle[ | ]
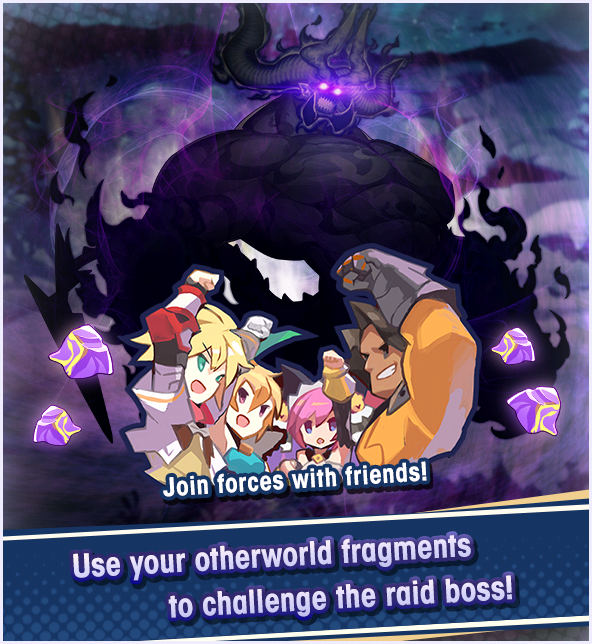
Raid battles[2] are a co-op exclusive quest where up to 16 units can participate (4 per player). This involves fighting a giant Raid boss that has multiple body parts with their own HP bars. Damage to any body part will contribute damage to the boss's overall HP, but fully depleting the HP of a part will break it, leading to more rewards and sometimes weakening the boss's attacks.
Participating in a Raid battle costs getherwings as well as ![]() Otherworld Fragments.
Otherworld Fragments.
Beginner difficulty Raid battles are the primary source of ![]() Silver Emblems, while Expert difficulty gives
Silver Emblems, while Expert difficulty gives ![]() Gold Emblems. Expert Raid battles also have a chance to drop
Gold Emblems. Expert Raid battles also have a chance to drop ![]() Otherworld Gems.
Otherworld Gems.
EX Raid[ | ]
EX Raid can be accessed with ![]() Otherworld Gems after clearing Expert. The boss will have additional attacks, and different attack patterns than in Expert.
Otherworld Gems after clearing Expert. The boss will have additional attacks, and different attack patterns than in Expert.
Rewards primarily include a significantly larger amount of ![]() Gold Emblems than Expert difficulty offers.
Gold Emblems than Expert difficulty offers.
Playing this mode will only cost ![]() Otherworld Gems - no
Otherworld Gems - no ![]() Otherworld Fragments or Getherwings are consumed.
Otherworld Fragments or Getherwings are consumed.
Nightmare Raid[ | ]
Nightmare Raid[3] can be accessed after clearing EX Raid. The boss will have significantly more HP than EX Raid, and the time limit is shorter, demanding that players deal high amounts of damage quickly.
Regular drop rewards are the same as in Expert, including the chance to drop ![]() Otherworld Gems.
Otherworld Gems.
Grand Bounty [ | ]
[ | ]
Additionally, the first clear of Nightmare each day will award the Grand Bounty![]() - a random selection of 5 rewards, 1 from each of the pools listed below. Pools A through C contain rare items, while Pools D and E contain Bronze and Silver Emblems respectively.[4].
- a random selection of 5 rewards, 1 from each of the pools listed below. Pools A through C contain rare items, while Pools D and E contain Bronze and Silver Emblems respectively.[4].
Reward Pool A
Reward Pool B
Reward Pool C
Reward Pool D
Reward Pool E
Omega Solo and Omega Raid[ | ]
Omega Solo and Raid[5] are exceptionally difficult quests.
Omega Solo is a single-player difficulty mode that can be unlocked by clearing Nightmare difficulty and obtaining 3 ![]() Omega Keys from Emblem collection rewards. Omega Solo has the player face the Raid boss alone, with just their own team of 4 adventurers. The boss uses similar attack patterns to Expert, EX, and Nightmare, however may differ in traits such as Condition resistance. This mode was first released at the same time as Raid Boosts, so it is balanced around having those boosts, and therefore highly recommended to bring maxed Raid Boosts into the fight. First-clear rewards tend to include
Omega Keys from Emblem collection rewards. Omega Solo has the player face the Raid boss alone, with just their own team of 4 adventurers. The boss uses similar attack patterns to Expert, EX, and Nightmare, however may differ in traits such as Condition resistance. This mode was first released at the same time as Raid Boosts, so it is balanced around having those boosts, and therefore highly recommended to bring maxed Raid Boosts into the fight. First-clear rewards tend to include ![]() Damascus Crystal x5, and drop rewards are similar to those offered in Expert or Nightmare[6]. Successfully clearing this mode will also unlock the Omega Raid difficulty.
Damascus Crystal x5, and drop rewards are similar to those offered in Expert or Nightmare[6]. Successfully clearing this mode will also unlock the Omega Raid difficulty.
Omega Raid is a co-op difficulty similar to Expert, EX, and Nightmare Raid battles, but the boss has higher HP and deals more damage. Omega Raids are only available during specific times during the Raid, usually weekends. It comes in 3 difficulty levels: Level 1, Level 2[7], and Level 3[8], and drop rewards are similar to those offered in Expert or Nightmare[9].
- Omega Level 1's first-clear rewards tend to include Damascus Crystal x5.
- Omega Level 2 and Omega Level 3's first-clear rewards tend to include Exquisite Honey x5.
Progression[ | ]
Otherworld Fragments [ | ]
Otherworld Fragments are a resource that can be used alongside getherwings to challenge Raid battles. They are primarily obtained as drops from boss battles.
Otherworld Gems [ | ]
Otherworld Gems[10] are a resource that can be used to challenge EX Raid battles. They can be obtained as drops from Expert or Nightmare Raid battles.
Omega Keys [ | ]
Omega Keys[11] are special items used to unlock Omega Solo quests. 3 keys need to be obtained to unlock the quest, and these keys can be found in Bronze, Silver, and Gold Emblem collection rewards.
Raid Boosts[ | ]
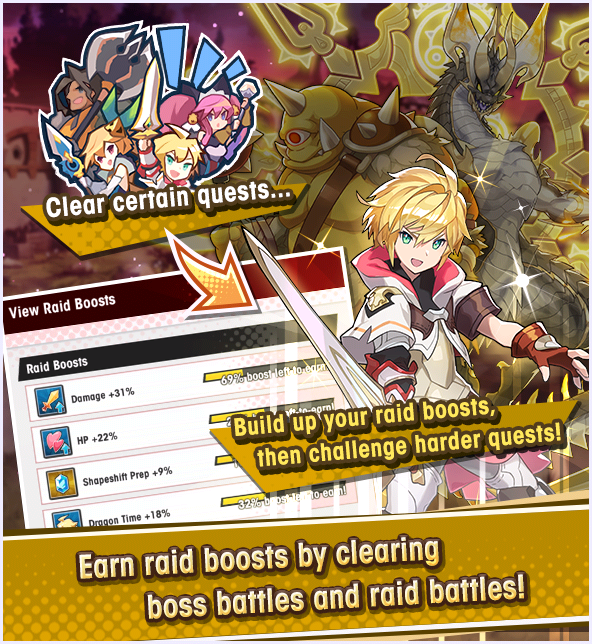
Raid Boosts[12] are passive effects to improve the player's combat performance during the Raid event. These can be earned in increments of 1-2% by clearing boss and Raid battles, and they stack up up to a set maximum amount.
Rare Raid Boosts are available as well, but unlike regular Raid Boosts they can be earned only from Raid battles, come at full power right away, and each type can only be obtained once during the event. Rare Raid Boosts are more likely to appear when clearing higher-difficulty quests.
Rewards[ | ]
Adventurer[ | ]

Each Raid Event includes a free Adventurer that temporarily joins the player's roster. By completing quests with this character on the team, Raid-related or otherwise, friendship points can be earned. Points earned are equal to the stamina cost for the quest cleared, but if a Raid-related quest is cleared then the points gained are doubled. Once friendship points reach their maximum, the Adventurer will permanently join the player's roster. Assuming the appropriate Mana Circle nodes have been unlocked, maxing friendship points will also make the Adventurer's story available to view. Befriending the free Adventurer will also unlock a daily endeavor to obtain a ![]() Summon Voucher when all other daily Raid endeavors are complete[13].
Summon Voucher when all other daily Raid endeavors are complete[13].
If a Raid event ends but the free Adventurer's friendship points were never maxed, then they will not join the player's roster. However, should the Raid event be rerun, the Adventurer will retain their friendship points and any level or Mana Circle upgrades applied when the player last had them.
This Adventurer has an element advantage over their Raid's boss, often has a Class Bane that is effective against the Raid boss, and has a maximum resistance of 50% to the main Condition that the boss inflicts.
Initially, the Adventurers provided by a Raid Event were 4 ![]() . From Timeworn Torment/May 2020 onwards, newer Adventurers are at 5
. From Timeworn Torment/May 2020 onwards, newer Adventurers are at 5 ![]() by default. While the event remains active, their Mana Circles can be unlocked with special items that are obtained from the event (e.g. Wu Kong's Conviction), greatly decreasing the cost of empowering them.
by default. While the event remains active, their Mana Circles can be unlocked with special items that are obtained from the event (e.g. Wu Kong's Conviction), greatly decreasing the cost of empowering them.
5 Dragon[ | ]

Several Raid Events include a free 5 ![]() Dragon that can be obtained 5 times, enough to allow it to be Max Unbound. 4 copies of the Dragon can be obtained from Blazon Summons, while 1 copy can be obtained from
Dragon that can be obtained 5 times, enough to allow it to be Max Unbound. 4 copies of the Dragon can be obtained from Blazon Summons, while 1 copy can be obtained from ![]() Silver Emblem collection rewards.
Silver Emblem collection rewards.
This Dragon usually shares the same element as their Raid's boss[14]. Due to their status as free units, these Dragons will have weaker abilities and lower stats than 4 ![]() Dragons obtained from Summoning. At Max Unbound, one of these free dragons will have an ability comparable to that of a non-Unbound 4
Dragons obtained from Summoning. At Max Unbound, one of these free dragons will have an ability comparable to that of a non-Unbound 4 ![]() summmoned dragon.
summmoned dragon.
From Timeworn Torment/May 2020 onwards, newer Raid Events have not included a Dragon.
Emblems[ | ]
Emblems are collectible items that can be obtained from boss and Raid battles. They cannot be spent, but instead act as a score system, with rewards available depending on the total amount of each emblem type collected. There three types of emblems: Bronze, Silver, and Gold.
![]() Bronze Emblems can primarily be obtained from boss battles,
Bronze Emblems can primarily be obtained from boss battles, ![]() Silver Emblems are primarily from Beginner Raid battles, and
Silver Emblems are primarily from Beginner Raid battles, and ![]() Gold Emblems are primarily from Expert, EX, and Nightmare Raid battles. Bronze and Silver Emblems can also appear in the daily Grand Bounty from Nightmare Raids.
Gold Emblems are primarily from Expert, EX, and Nightmare Raid battles. Bronze and Silver Emblems can also appear in the daily Grand Bounty from Nightmare Raids.
Blazon Summons [ | ]

Participating in the Raid Event will award ![]() Peregrine Blazons. These can then be used in Blazon Summons[15] to obtain a variety of rewards, including the Raid Event's free 5
Peregrine Blazons. These can then be used in Blazon Summons[15] to obtain a variety of rewards, including the Raid Event's free 5 ![]() Dragon, Conviction items to unlock the featured Adventurer's Mana Circles and a 4
Dragon, Conviction items to unlock the featured Adventurer's Mana Circles and a 4 ![]() Wyrmprint[16]. Random Wyrmprints other than the Raid-specific one can also be obtained from Blazon Summons. These prints are mostly 3
Wyrmprint[16]. Random Wyrmprints other than the Raid-specific one can also be obtained from Blazon Summons. These prints are mostly 3 ![]() and 4
and 4 ![]() , and only one featured 5
, and only one featured 5 ![]() Wyrmprint has a chance to appear. This featured print tends to have an elemental or affliction resistance relevant to the Raid's boss[17].
Wyrmprint has a chance to appear. This featured print tends to have an elemental or affliction resistance relevant to the Raid's boss[17].
Blazon Summons are divided into "boxes", each containing a set amount for each type of reward. Once a reward has been obtained, it is removed from the box, and this process continues until the box is empty. Attempting to summon again will prompt the player to "reset" the box, which will make it proceed from box #1 to #2 etc, with different rewards. Boxes #1 to #4 each contain 1 copy of the free 5 ![]() Dragon and 4
Dragon and 4 ![]() Wyrmprint, while boxes #5 onwards will contain 1 copy of the Wyrmprint but will not contain a copy of the Dragon.
Wyrmprint, while boxes #5 onwards will contain 1 copy of the Wyrmprint but will not contain a copy of the Dragon.
Boxes can be prematurely reset without emptying them by pressing the "reset" button after the Dragon copy from that box has been summoned. Resetting in this way will forfeit the unclaimed contents of the box, and proceed to the next box. This results in less rewards overall, and is only advised if one is in a rush for all copies of the Dragon specifically.
Event Changelog[ | ]
The following is a list of the in-game changes that have been made to this Event format over time:
| Update Changelog | ||
|---|---|---|
| Date | Changes | |
| September 30, 2020 |
| |
| September 21, 2020 |
| |
| July 20, 2020 |
| |
| May 27, 2020 |
| |
| May 12, 2020 |
| |
| December 31, 2019 |
| |
| November 13, 2019 |
| |
| September 30, 2019 |
| |
| July 31, 2019 |
| |
| May 31, 2019 |
| |
| May 14, 2019 |
| |
| Feb 28, 2019 |
| |
| January 31, 2019 |
| |
| December 31, 2018 |
| |
| November 30, 2018 |
| |
| October 31, 2018 |
| |
| October 4, 2018 |
| |
Raid Event Archive[ | ]
| Name | Type | Exclusive Adventurer | Exclusive Dragon | Exclusive Wyrmprint | Start Date | End Date |
|---|---|---|---|---|---|---|
 Scars of the Syndicate/January 2021 |
Raid | Aldred | Barbatos | A Pledge of Protection | 2021-01-21 6:00:00 AM | 2021-01-31 5:59:59 AM |
 Cursed Connections/December 2020 |
Raid | Kuzunoha | Amaterasu Oblation | 2020-12-31 6:00:00 AM | 2021-01-13 5:59:59 AM | |
 Forgotten Truths/Event Compendium |
Raid | Mordecai | 2020-12-23 6:00:00 AM | |||
 Fractured Futures/Event Compendium |
Raid | Audric | Parallel Zodiark | 2020-12-23 6:00:00 AM | ||
 Princess Connect! Re: Dive: A Voracious Visitor/November 2020 |
Raid | Forager Cleo | Pecorine's Grand Adventure | 2020-11-30 6:00:00 AM | 2020-12-14 5:59:59 AM | |
 A Clawful Caper/November 2020 |
Raid | Hanabusa | Ebisu | A Game of Cat and Boar | 2020-11-16 6:00:00 AM | 2020-11-30 5:59:59 AM |
Forgotten Truths/September 2020 |
Raid | Mordecai | 2020-09-30 6:00:00 AM | 2020-10-12 5:59:59 AM | ||
Fractured Futures/September 2020 |
Raid | Audric | Parallel Zodiark | 2020-09-21 6:00:00 AM | 2020-09-30 5:59:59 AM | |
 Doomsday Getaway/July 2020 |
Raid | Summer Amane | Fun in the Sun | 2020-07-28 6:00:00 AM | 2020-08-11 5:59:59 AM | |
 A Splash of Adventure/July 2020 |
Raid | Summer Estelle | Erasmus | Preacher's Vacation | 2020-07-20 6:00:00 AM | 2020-07-28 4:29:59 AM |
 Timeworn Torment/May 2020 |
Raid | Wu Kong | Happy Times | 2020-05-27 6:00:00 AM | 2020-06-12 5:59:59 AM | |
 Loyalty's Requiem/May 2020 |
Raid | Celliera | Pele | Paladyn Defender | 2020-05-12 6:00:00 AM | 2020-05-22 5:59:59 AM |
Scars of the Syndicate/March 2020 |
Raid | Aldred | Barbatos | A Pledge of Protection | 2020-03-31 6:00:00 AM | 2020-04-13 5:59:59 AM |
 Skyborne Spectacle/March 2020 |
Raid | Su Fang | Peng Lai | Dragon Dance | 2020-03-12 6:00:00 AM | 2020-03-23 5:59:59 AM |
 Monster Hunter Primal Crisis/January 2020 |
Raid | Rathalos | A Suit of Midnight • Felyne Hospitality • Unexpected Requests • The Lurker in the Woods • Primal Crisis • Soaring Terror | 2020-01-29 6:00:00 AM | 2020-02-17 5:59:59 AM | |
A Clawful Caper/December 2019 |
Raid | Hanabusa | Ebisu | A Game of Cat and Boar | 2019-12-31 6:00:00 AM | 2020-01-14 5:59:59 AM |
 Fortune from Afar/December 2019 |
Raid | Botan | Shishimai (Dragon) | Luck of the Draw | 2019-12-26 6:00:00 AM | 2019-12-31 5:59:59 AM |
 Kindness and Captivity/November 2019 |
Raid | Melsa | Sylvia | Better Together | 2019-11-13 6:00:00 AM | 2019-11-25 5:59:59 AM |
Fractured Futures/September 2019 |
Raid | Audric | Parallel Zodiark | The Bewitching Magician • United by One Vision | 2019-09-30 6:00:00 AM | 2019-10-11 5:59:59 AM |
Skyborne Spectacle/August 2019 |
Raid | Su Fang | Peng Lai | Dragon Dance | 2019-08-31 6:00:00 AM | 2019-09-12 5:59:59 AM |
A Splash of Adventure/July 2019 |
Raid | Summer Estelle | Erasmus | Preacher's Vacation | 2019-07-31 6:00:00 AM | 2019-08-13 5:59:59 AM |
Fortune from Afar/June 2019 |
Raid | Botan | Shishimai (Dragon) | Luck of the Draw | 2019-06-30 6:00:00 AM | 2019-07-11 5:59:59 AM |
 Echoes of Antiquity/May 2019 |
Raid | Xuan Zang | Yulong | A Maddened Master | 2019-05-31 6:00:00 AM | 2019-06-12 5:59:59 AM |
 Resplendent Refrain/May 2019 |
Raid | Elias | Maritimus | As the Snow Falls | 2019-05-14 6:00:00 AM | 2019-05-24 5:59:59 AM |
 A Waltz with Fate/February 2019 |
Raid | Felicia | Phantom | Delightful Dancer | 2019-02-28 6:00:00 AM | 2019-03-12 5:59:59 AM |
Skyborne Spectacle/January 2019 |
Raid | Su Fang | Peng Lai | Dragon Dance | 2019-01-31 6:00:00 AM | 2019-02-12 5:59:59 AM |
Fortune from Afar/December 2018 |
Raid | Botan | Shishimai (Dragon) | Luck of the Draw | 2018-12-31 6:00:00 AM | 2019-01-10 5:59:59 AM |
Resplendent Refrain/November 2018 |
Raid | Elias | Maritimus | As the Snow Falls | 2018-11-30 6:00:00 AM | 2018-12-12 5:59:59 AM |
Kindness and Captivity/October 2018 |
Raid | Melsa | Sylvia | Better Together | 2018-10-31 6:00:00 AM | 2018-11-12 5:59:59 AM |
Loyalty's Requiem/October 2018 |
Raid | Celliera | Pele | Paladyn Defender | 2018-10-04 6:00:00 AM | 2018-10-15 5:59:59 AM |
Notes[ | ]
- ↑ From Kindness and Captivity/November 2019 onwards, Boss battles only have Beginner and Expert difficulties. The rewards from Standard difficulty have been moved into Beginner.
- ↑ From Kindness and Captivity/November 2019 onwards, Raid Battles only have Beginner and Expert difficulties. The rewards from Standard difficulty have been moved into Beginner.
- ↑ Nightmare Raids was first added in Resplendent Refrain/May 2019.
- ↑ The Grand Bounty was updated to include Bronze and Silver Emblems from Fractured Futures/September 2019 onwards.
- ↑ Omega difficulty was first added in Fractured Futures/September 2019.
- ↑ Prior to A Clawful Caper/December 2019, no items would drop upon completing Omega Solo.
- ↑ The Omega 2 difficulty was available starting with Loyalty's Requiem/May 2020
- ↑ The Omega 3 difficulty was available starting with Forgotten Truths/September 2020
- ↑ Prior to A Clawful Caper/December 2019, no items would drop upon completing Omega Raid.
- ↑ Otherworld Gems was first added in Fractured Futures/September 2019. Prior to this, EX battles had a random chance to unlock after clearing Expert or Nightmare. However, EX unlocks could not be stacked - the player had to clear EX before playing Expert/Nightmare again in order to get another unlock chance. The addition of Otherworld Gems solved this issue by allowing players to stack EX runs.
- ↑ Omega Keys were first added in Fractured Futures/September 2019.
- ↑ Raid Boosts were first added in Fractured Futures/September 2019. Rare Raid Boosts could drop from boss battles as well in this event, but that was removed as of Kindness and Captivity/November 2019.
- ↑ From A Waltz with Fate/February 2019 onwards, a daily Summon Voucher endeavor is available after befriending the free unit
- ↑ Parallel Zodiark from Fractured Futures/September 2019 was the first Dragon to not match the raid boss's element. This was later followed by Barbatos in Scars of the Syndicate/March 2020.
- ↑ From A Splash of Adventure/July 2019 onwards, Blazon Summons cost just 1 Blazon per summon. Prior to this, it cost 2 Blazons per summon.
- ↑ From Resplendent Refrain/November 2018 onwards, the free 4 Wyrmprint no longer has a Bane ability to boost damage against the boss. At this time only 1 Wyrmprint was equippable per Adventurer, so this change was made to allow non-Raid Wyrmprints to be usable instead.
- ↑ From Echoes of Antiquity/May 2019 onwards, featured 5 prints are available from Blazons
| |||||||||||||||||||||||||||||